【EC-CUBE4.2】商品説明の内容をChatGPTに校正してもらう
EC-CUBE4.2の商品説明の内容をChatGPTに校正してもらおうと思い作りました。
実装方法は以下のとおりです。
ChatGPTライブラリをインストール
composer require orhanerday/open-aiChatGPTのAPIキーを取得
ChatGPTのAPIキーを取得してください。
.envにChatGPTのAPIキーを設定
OPENAI_API_KEY=sk-vvrvd....Customizeディレクトリにservices.yamlを作成
services.yamlをCustomizeディレクトリに作成してください。
app/Customize/Resource/config/services.yaml
parameters:
  open_ai_key: '%env(OPENAI_API_KEY)%'

twig:
  paths:
    '%kernel.project_dir%/app/Customize/Resource/template': Customize
ChatGptControllerを作成
<?php

namespace Customize\Controller;

use Eccube\Controller\AbstractController;
use Orhanerday\OpenAi\OpenAi;
use Symfony\Component\HttpFoundation\Request;
use Symfony\Component\HttpFoundation\Response;
use Symfony\Component\Routing\Annotation\Route;

/**
 * @Route("/%eccube_admin_route%")
 */
class ChatGptController extends AbstractController
{
    /**
     * @param Request $request
     * @return Response
     * @throws \Exception
     *
     * @Route("/chat_gpt", name="chat_gpt", methods={"POST"})
     */
    public function index(Request $request): Response
    {
        $content = json_decode($request->getContent(), true);

        $openAi = new OpenAi($this->getParameter('open_ai_key'));
        $chat = $openAi->chat([
            'model' => 'gpt-3.5-turbo',
            'messages' => [
                [
                    'role' => 'system',
                    'content' => '誤字脱字を修正してください。',
                ],
                [
                    'role' => 'user',
                    'content' => $content['message'],
                ],
            ],
        ]);

        return new Response($chat);
    }
}
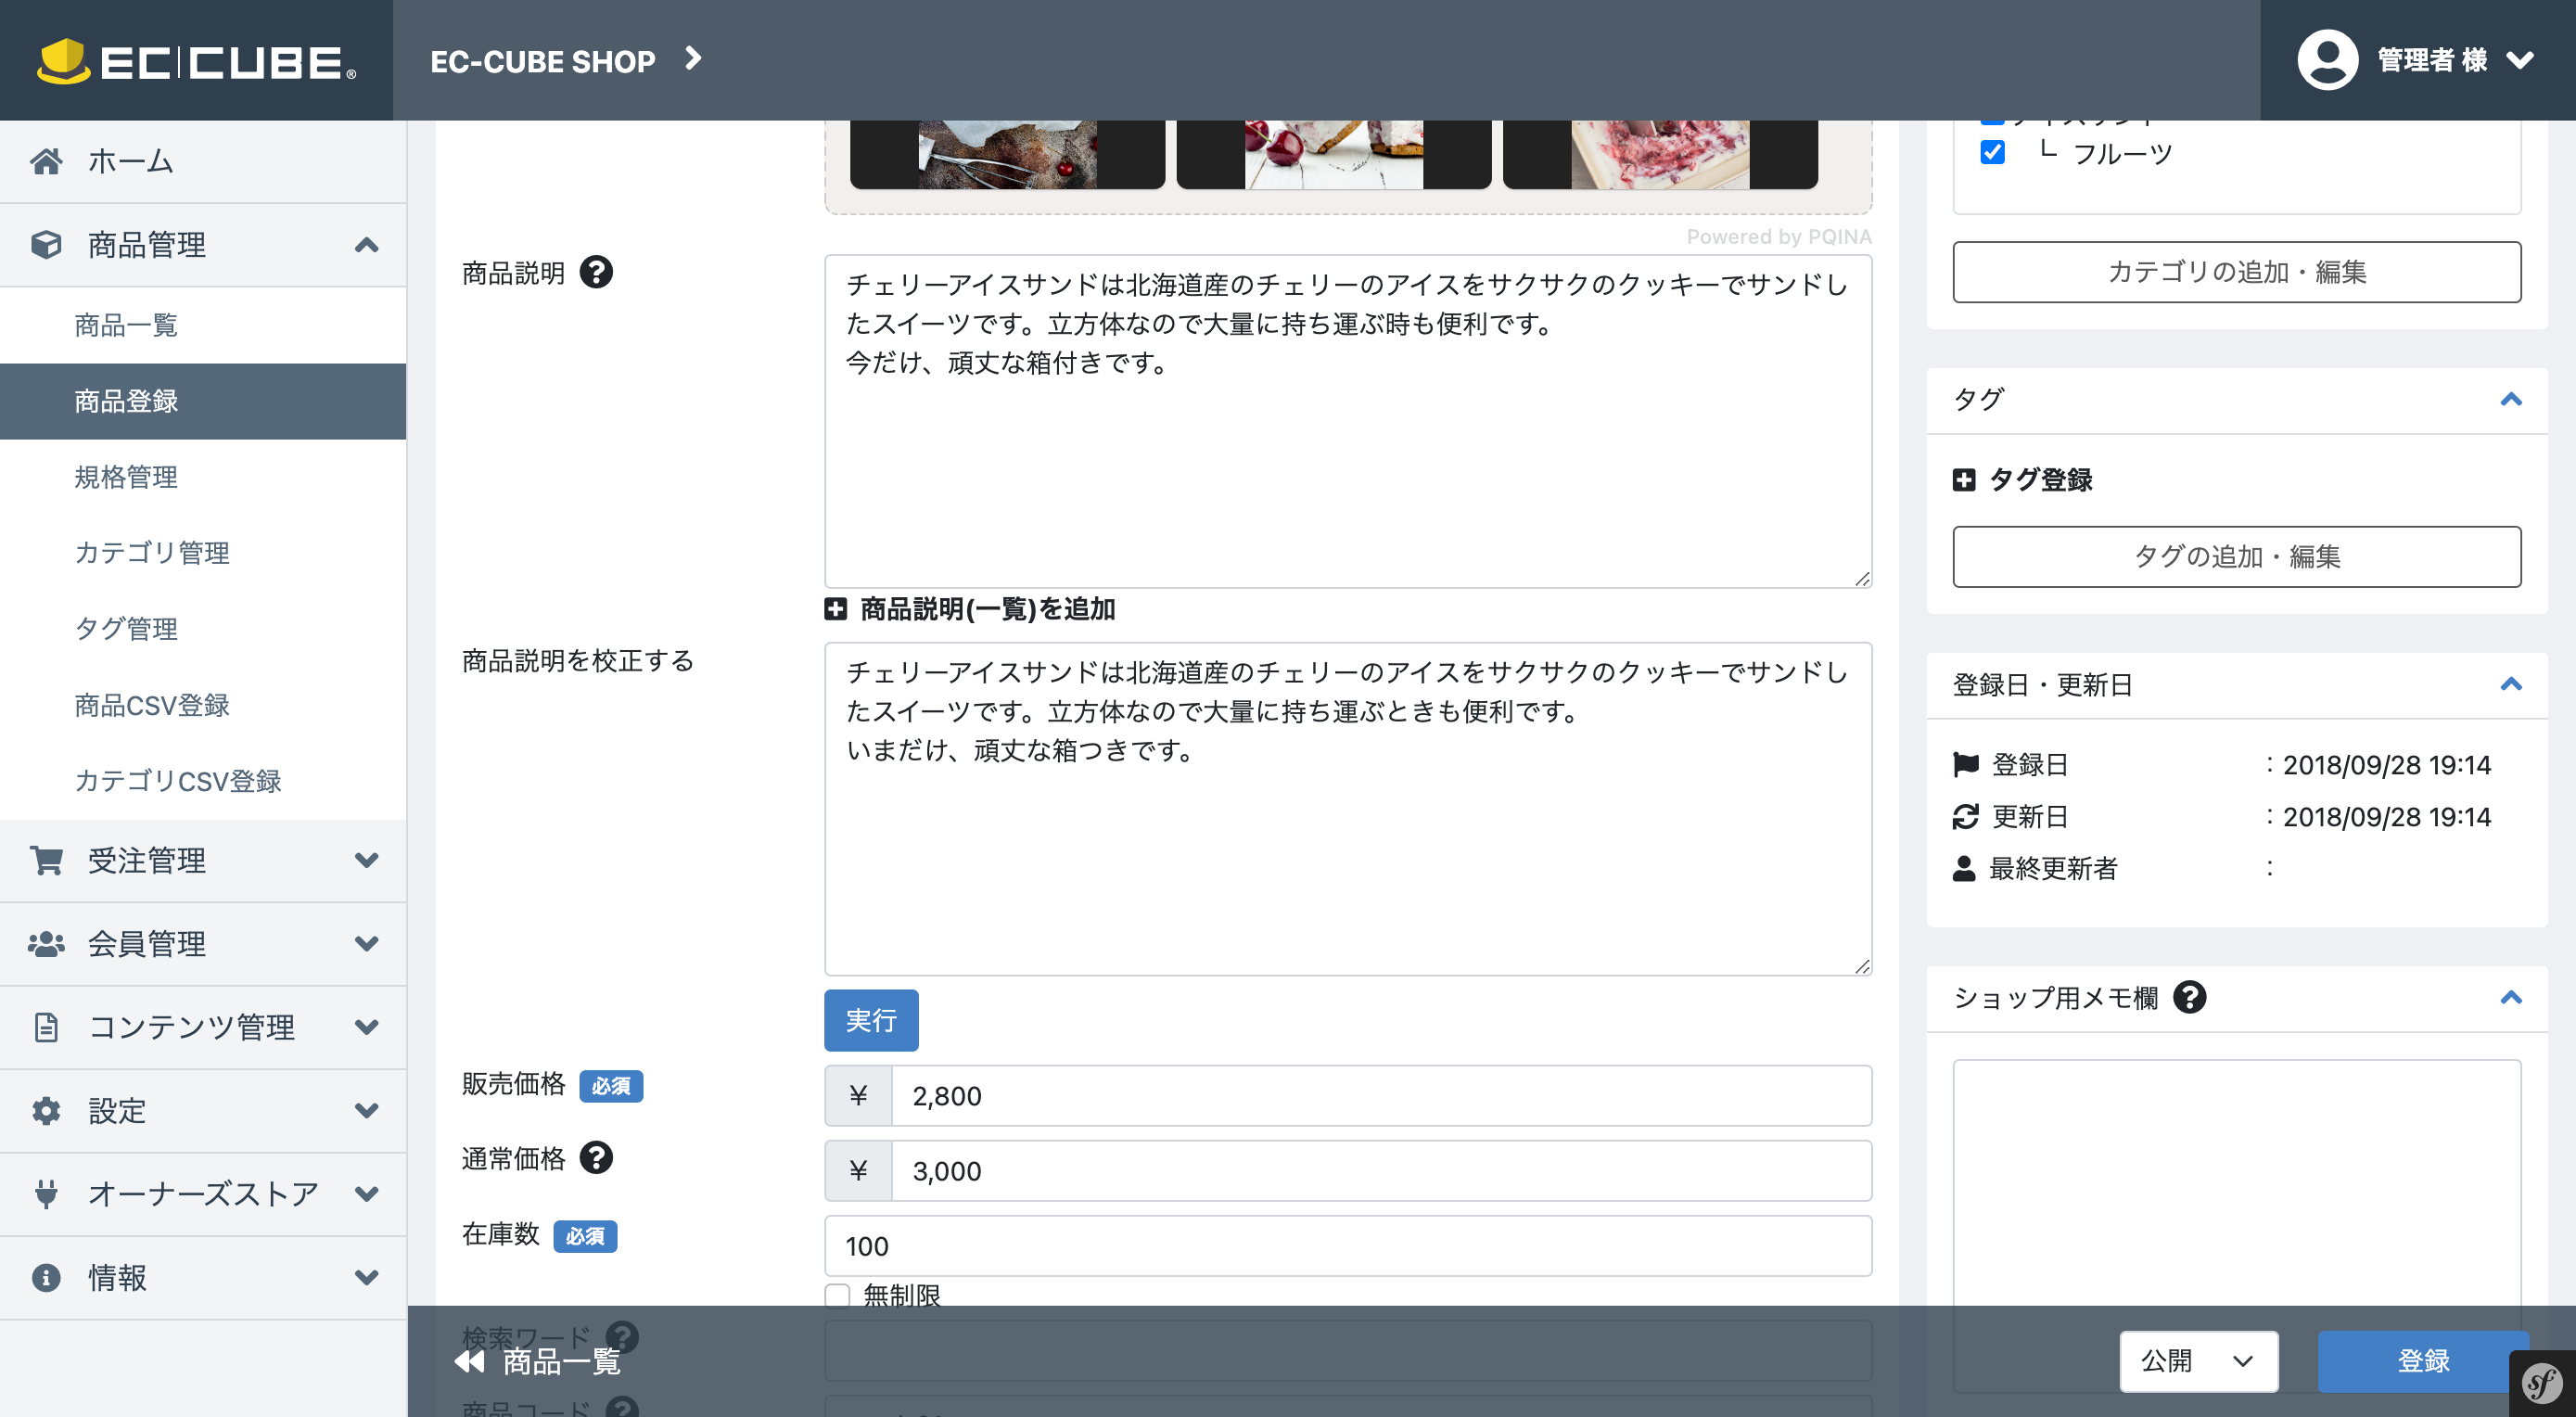
ChatGPTへ投げるデータを入力する項目のテンプレートを用意
app/Customize/Resource/template/admin/Product/edit.twig
<div class="row" id="chat">
    <div class="col-3">
        <div class="d-inline-block">
            <span>商品説明を校正する</span>
        </div>
    </div>
    <div class="col mb-2">
        <div>
            <textarea class="form-control mb-2 message" rows="8"></textarea>
            <input type="button" class="btn btn-primary" onClick="proofreading();" value="実行"/>
        </div>
    </div>
</div>

<script src="https://unpkg.com/axios@1.1.2/dist/axios.min.js"></script>
<script>
    $(function () {
        $('#addComment').before($('#chat'));
    });

    function proofreading() {
        async function getResponse() {
            let message = $('#chat textarea.message').val();
            try {
                const response = await axios.post('{{ path('chat_gpt') }}', {
                    "message": message,
                });
                $('#admin_product_description_detail').val(response.data.choices[0].message.content);
            } catch (error) {
                console.log(error);
            }
        }

        getResponse();
    }
</script>
上記テンプレートを読み込むイベントを作成
app/Customize/Event.php
<?php

namespace Customize;

use Eccube\Event\TemplateEvent;
use Symfony\Component\EventDispatcher\EventSubscriberInterface;

class Event implements EventSubscriberInterface
{
    public static function getSubscribedEvents()
    {
        return [
            '@admin/Product/product.twig' => 'onRenderAdminProductEdit',
        ];
    }

    public function onRenderAdminProductEdit(TemplateEvent $event)
    {
        $event->addSnippet('@Customize/admin/Product/edit.twig');
    }
}
以上で完成です。